Setup p0 on your on-prem server on Amazon AWS via AMI
Welcome to the on-premise installation instructions for p0 on AWS. Follow this guide to get set up with your own version of p0.
Go to AWS Console: https://console.aws.amazon.com/console/home
LoginSelect the
Regionof your installation.Go to
EC2—>Instances—>Launch New InstanceGive your instance a Name:
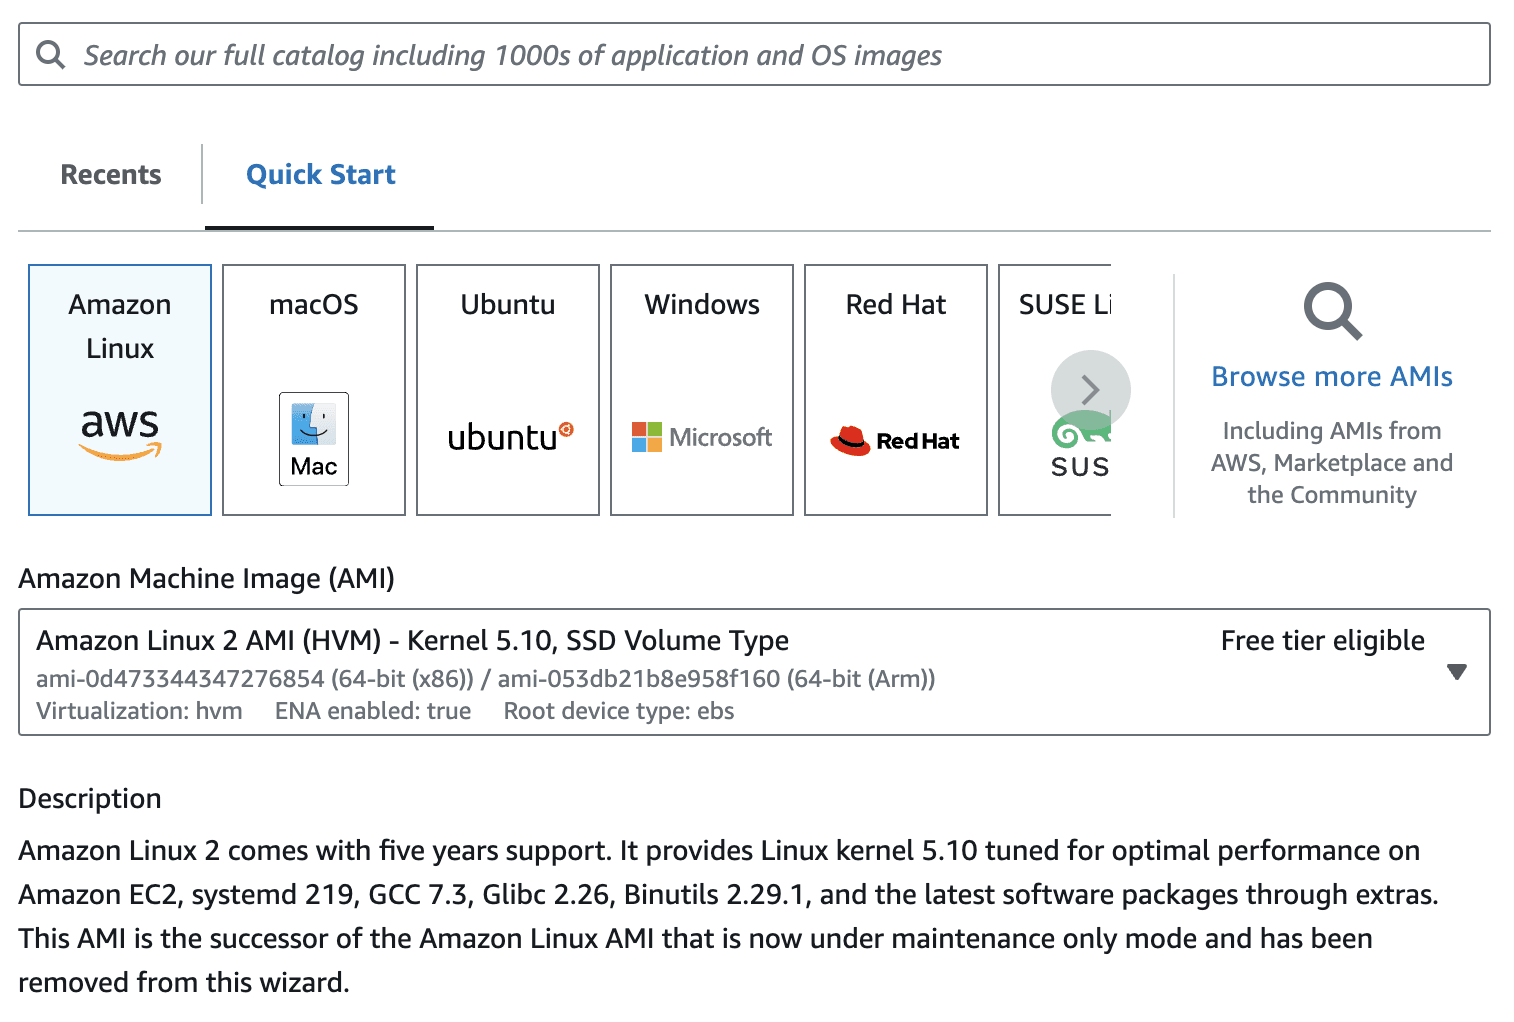
p0-platformSelect “Browse more AMIs”
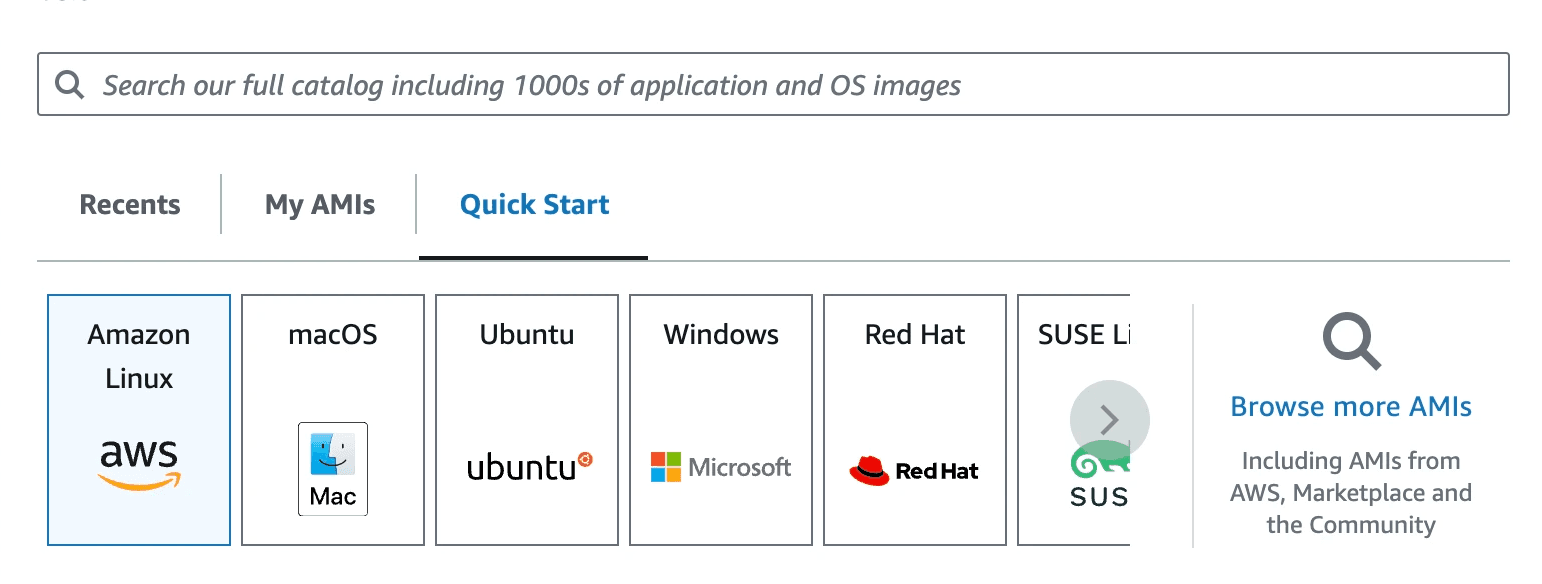
Click on “Community AMIs”
Search for
p0-dashboard
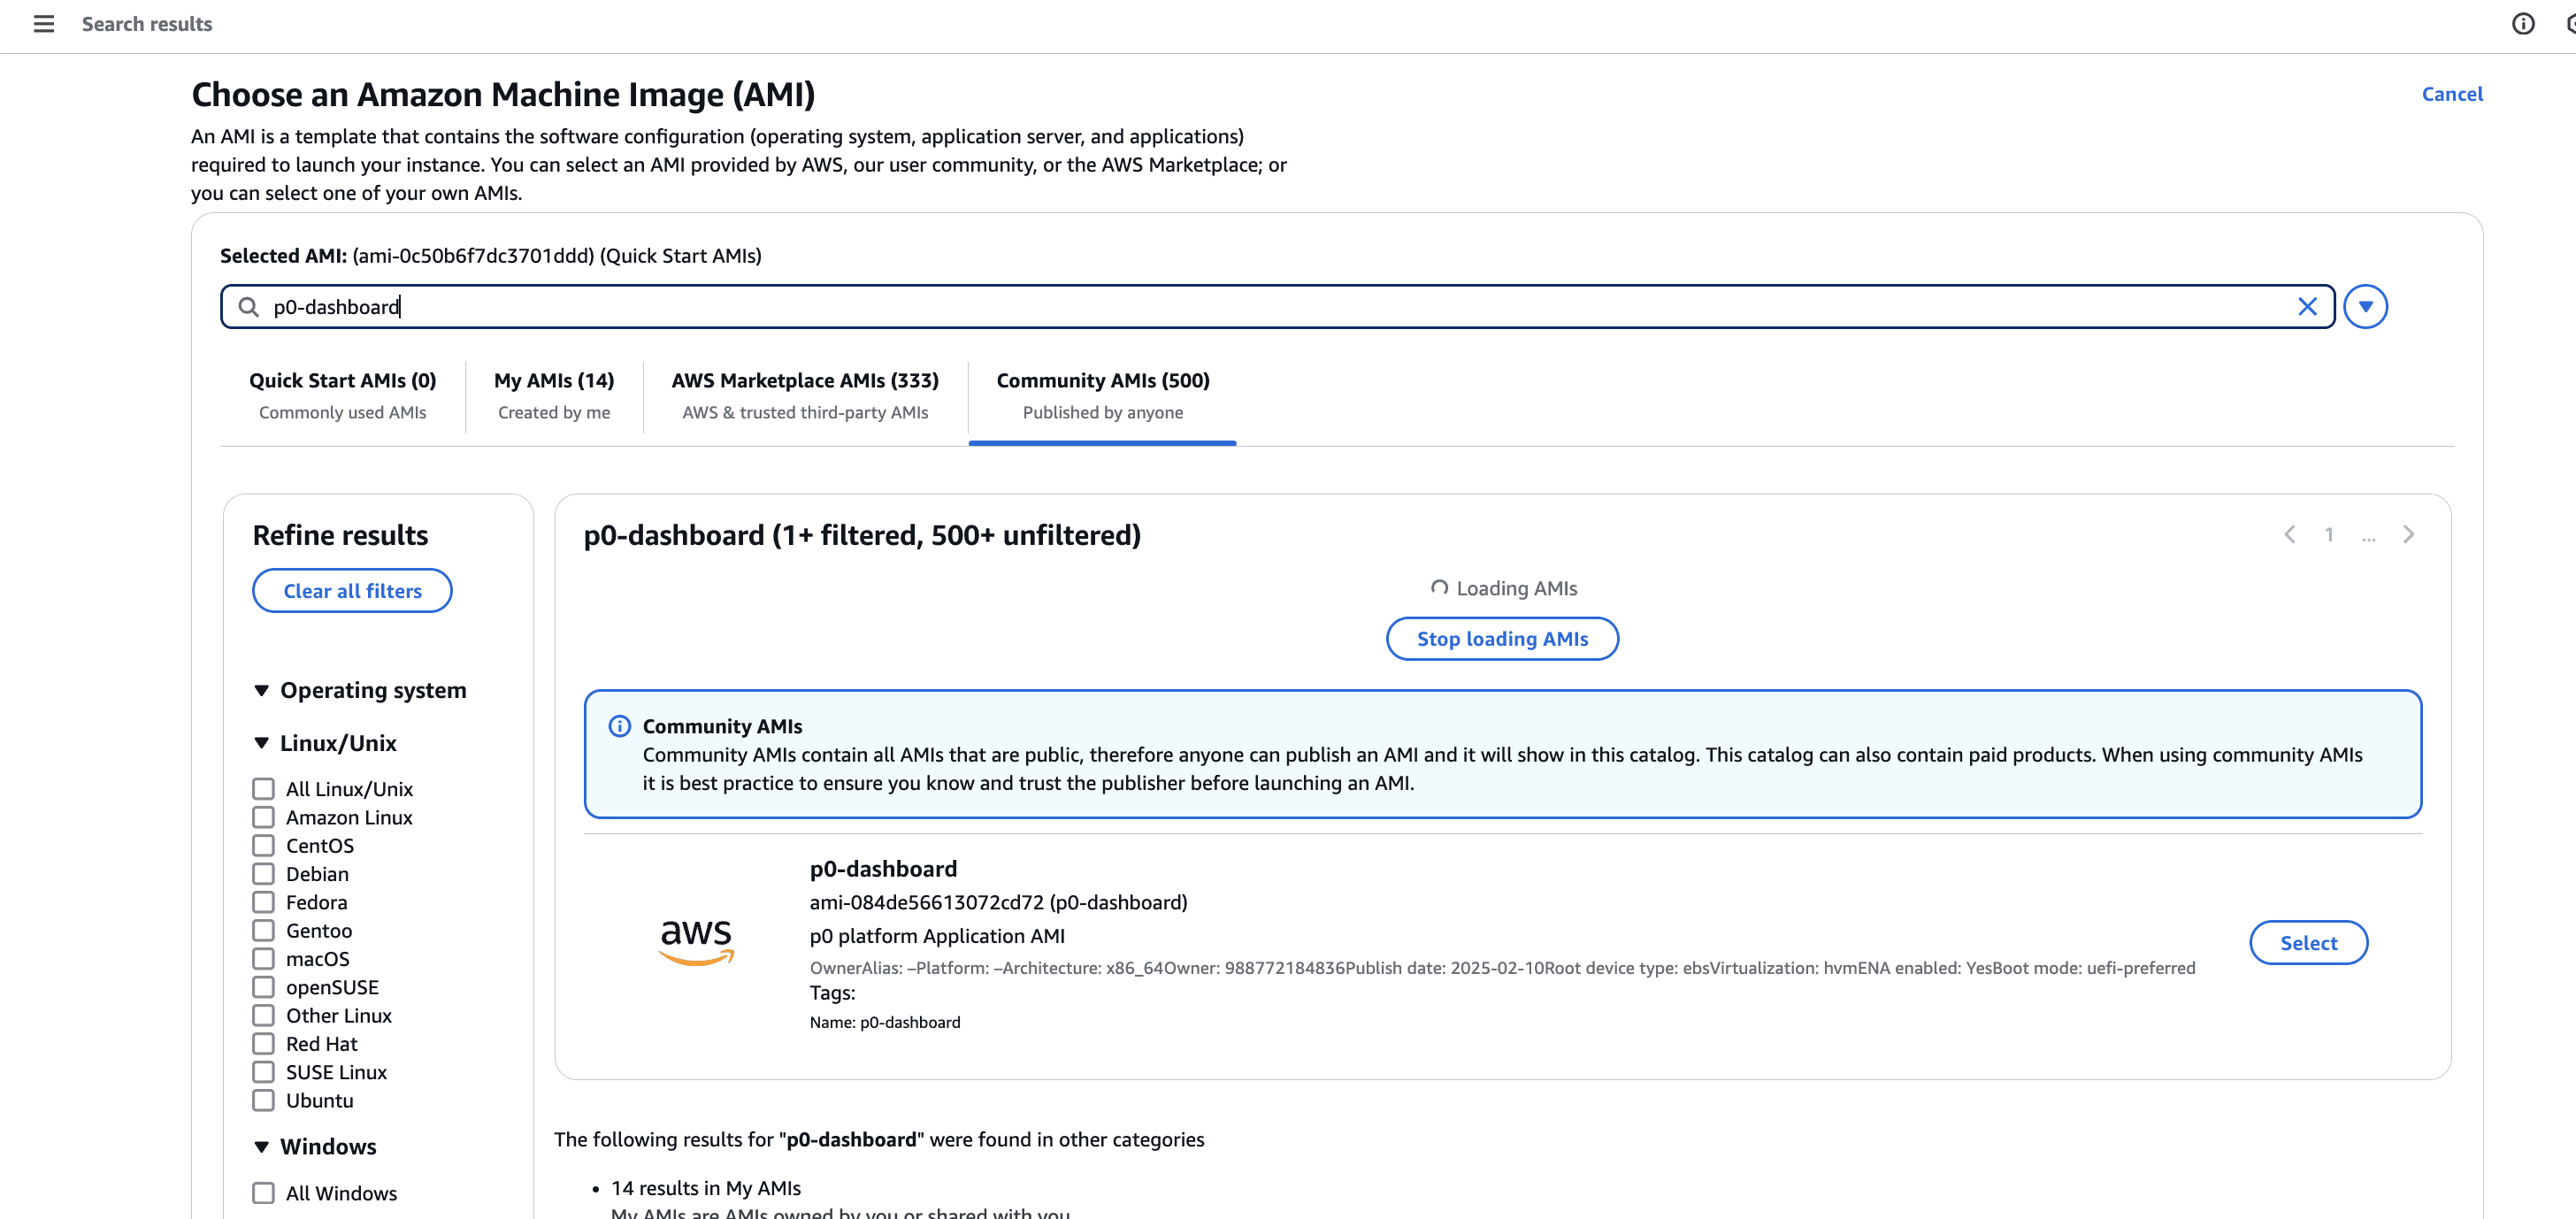
Click
SelectYou can select the following instance type:
t2.xlarge(4 CPUs and 16 GiB memory)
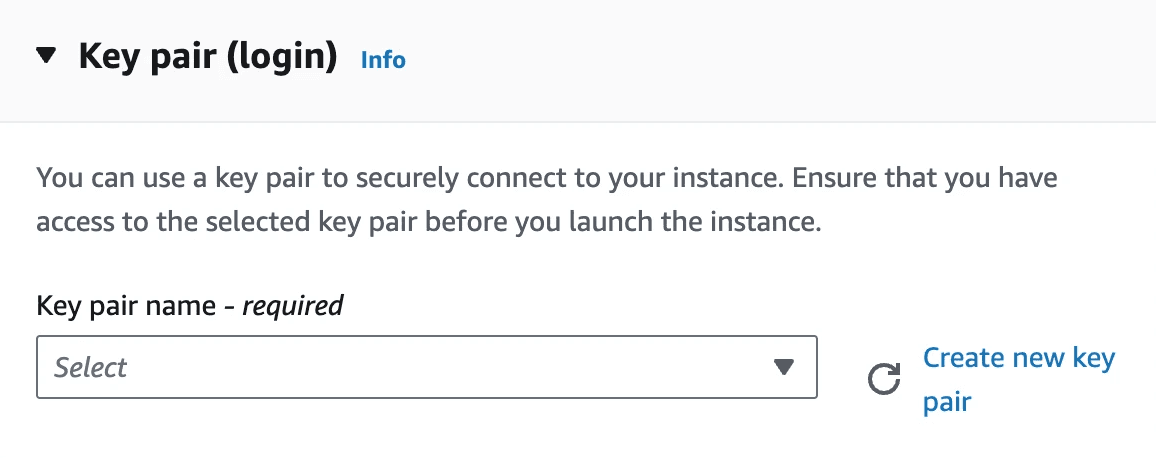
Take note of the key pair (or create a new one). You can use this to SSH into the box later.
In
Network Settingsyou can create a newSecurityGroupor re-use an old one. Just make sure thatYou can SSH into the server
The server can make requests to any of the public facing domains that you want to see are reachable / have API endpoints behind them
You can access the instance's IP from your browser
Go to
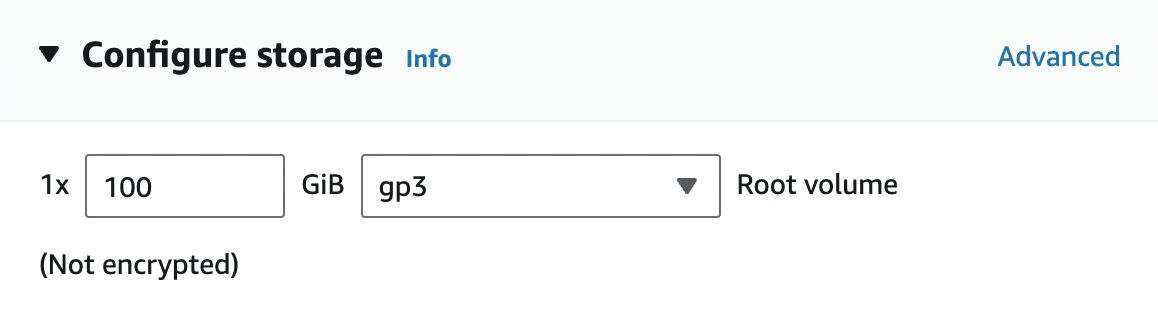
Configure StorageThis depends on the number of repositories that you have, but we recommend you start with 100GB of disk space. We need enough disk space to check out your organization’s repositories.
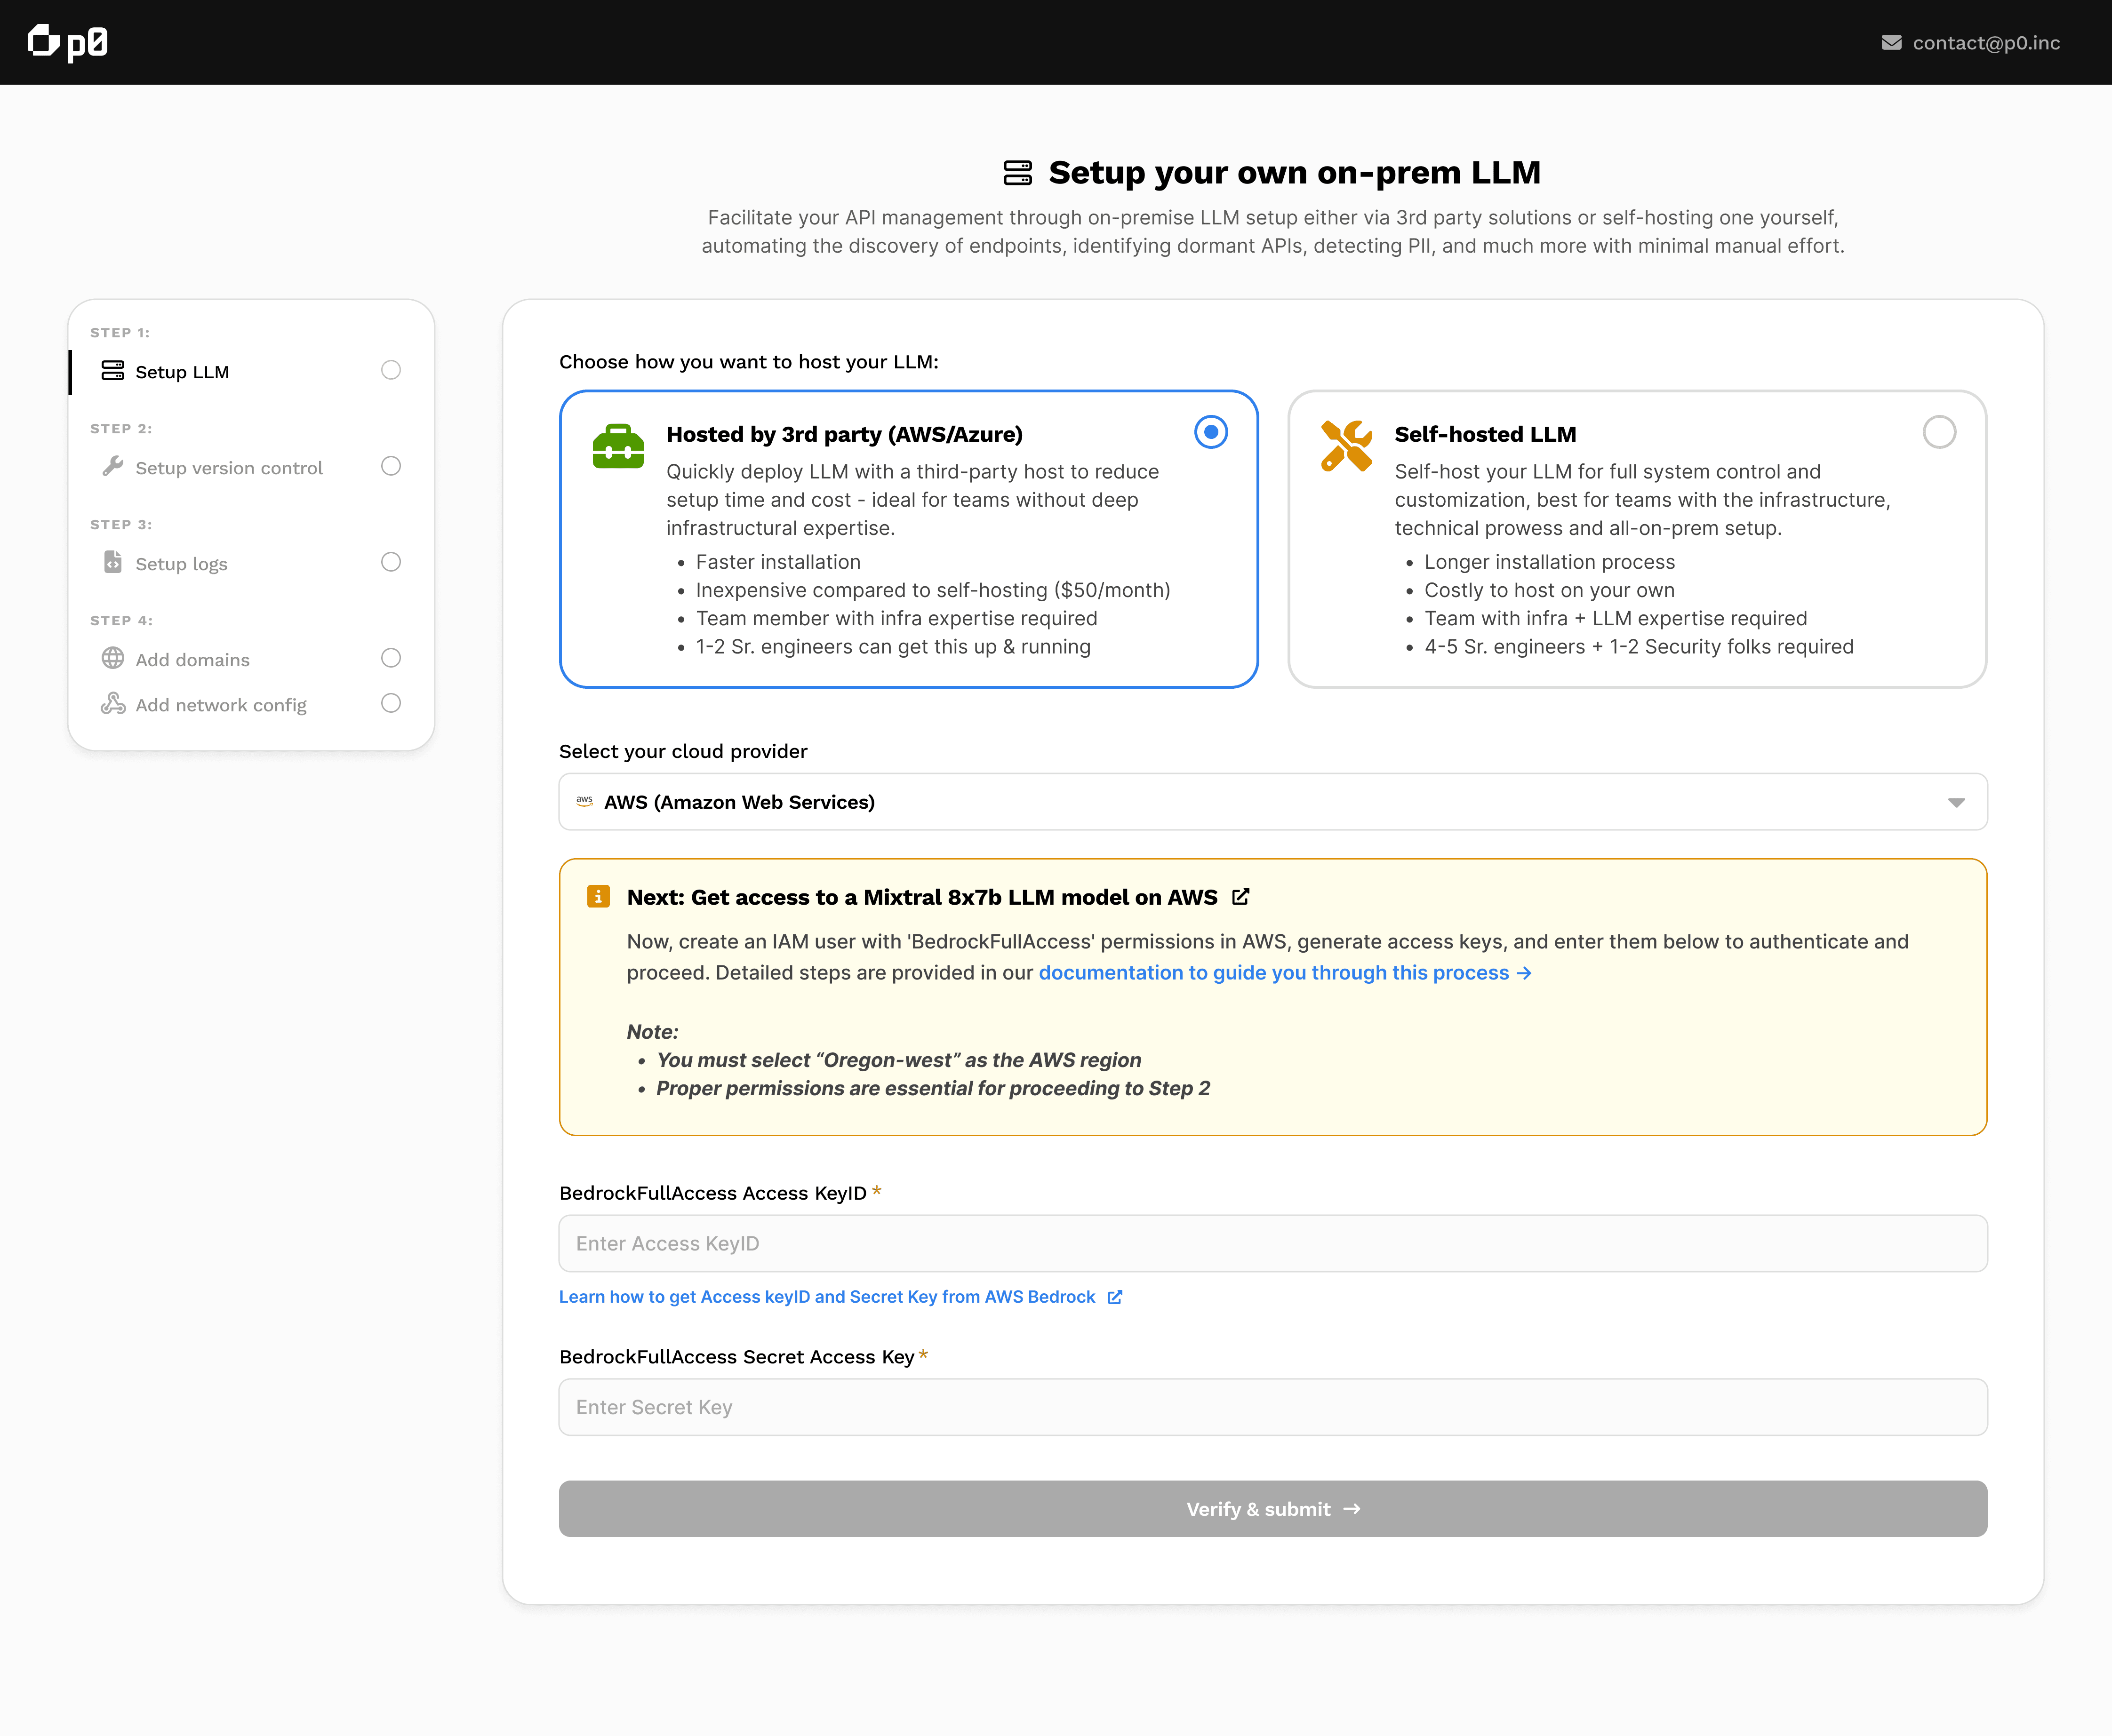
[Optional] Select an
IAM instanceprofile.
Note: This step is required only if you are providing access to Bedrock via an IAM role. Otherwise, you can skip this step.

Then press
Launch InstanceWait a few minutes. The instance will launch and you will see the below status for your EC2 Instance. Note that Public IPv4 address is optional.

Visit the IP address.
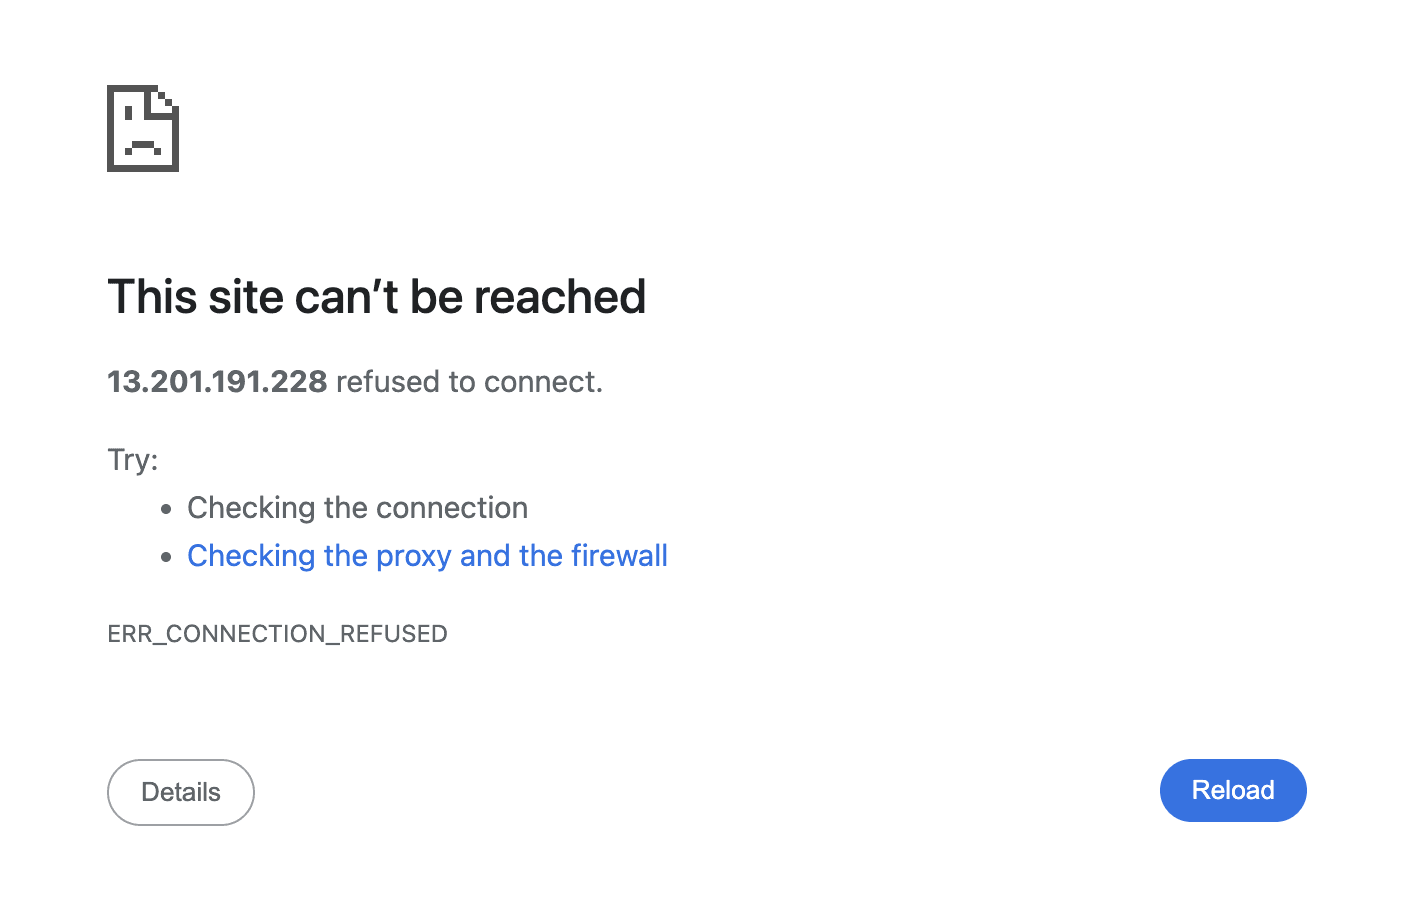
Initially you will see the below as the P0 service comes up. Just wait for 5 minutes and re-visit the IP.
When you visit you should see the below. Follow the steps in the product for the rest of onboarding.
Setup p0 on AWS Linux 2
Welcome to the on-premise installation instructions for p0 on AWS. Follow this guide to get set up with your own version of p0.
Go to AWS Console: https://console.aws.amazon.com/console/home
LoginSelect the
Regionof your installation.Go to
EC2—>Instances—>Launch New InstanceGive your instance a Name:
p0-platformSelect
Amazon LinuxThen select
Amazon Linux 2 AMI (HVM) - Kernel 5.10machine
You can select the following instance type:
t2.xlarge(4 CPUs and 16 GiB memory)
Connect to instance configuration:
Key pair: Take note of the key pair name (or create a new one). You can use this to SSH into the box later (see Key pair configuration screenshot below)
AWS Session Manager: If you already have an instance profile for Systems Manager, select it under the
Advanced detailssection. (See Advanced details screenshot below).
Note: In case you want to create a new profile, open this link and follow the steps mentioned under the section "To create an instance profile for Systems Manager managed instances (console)".
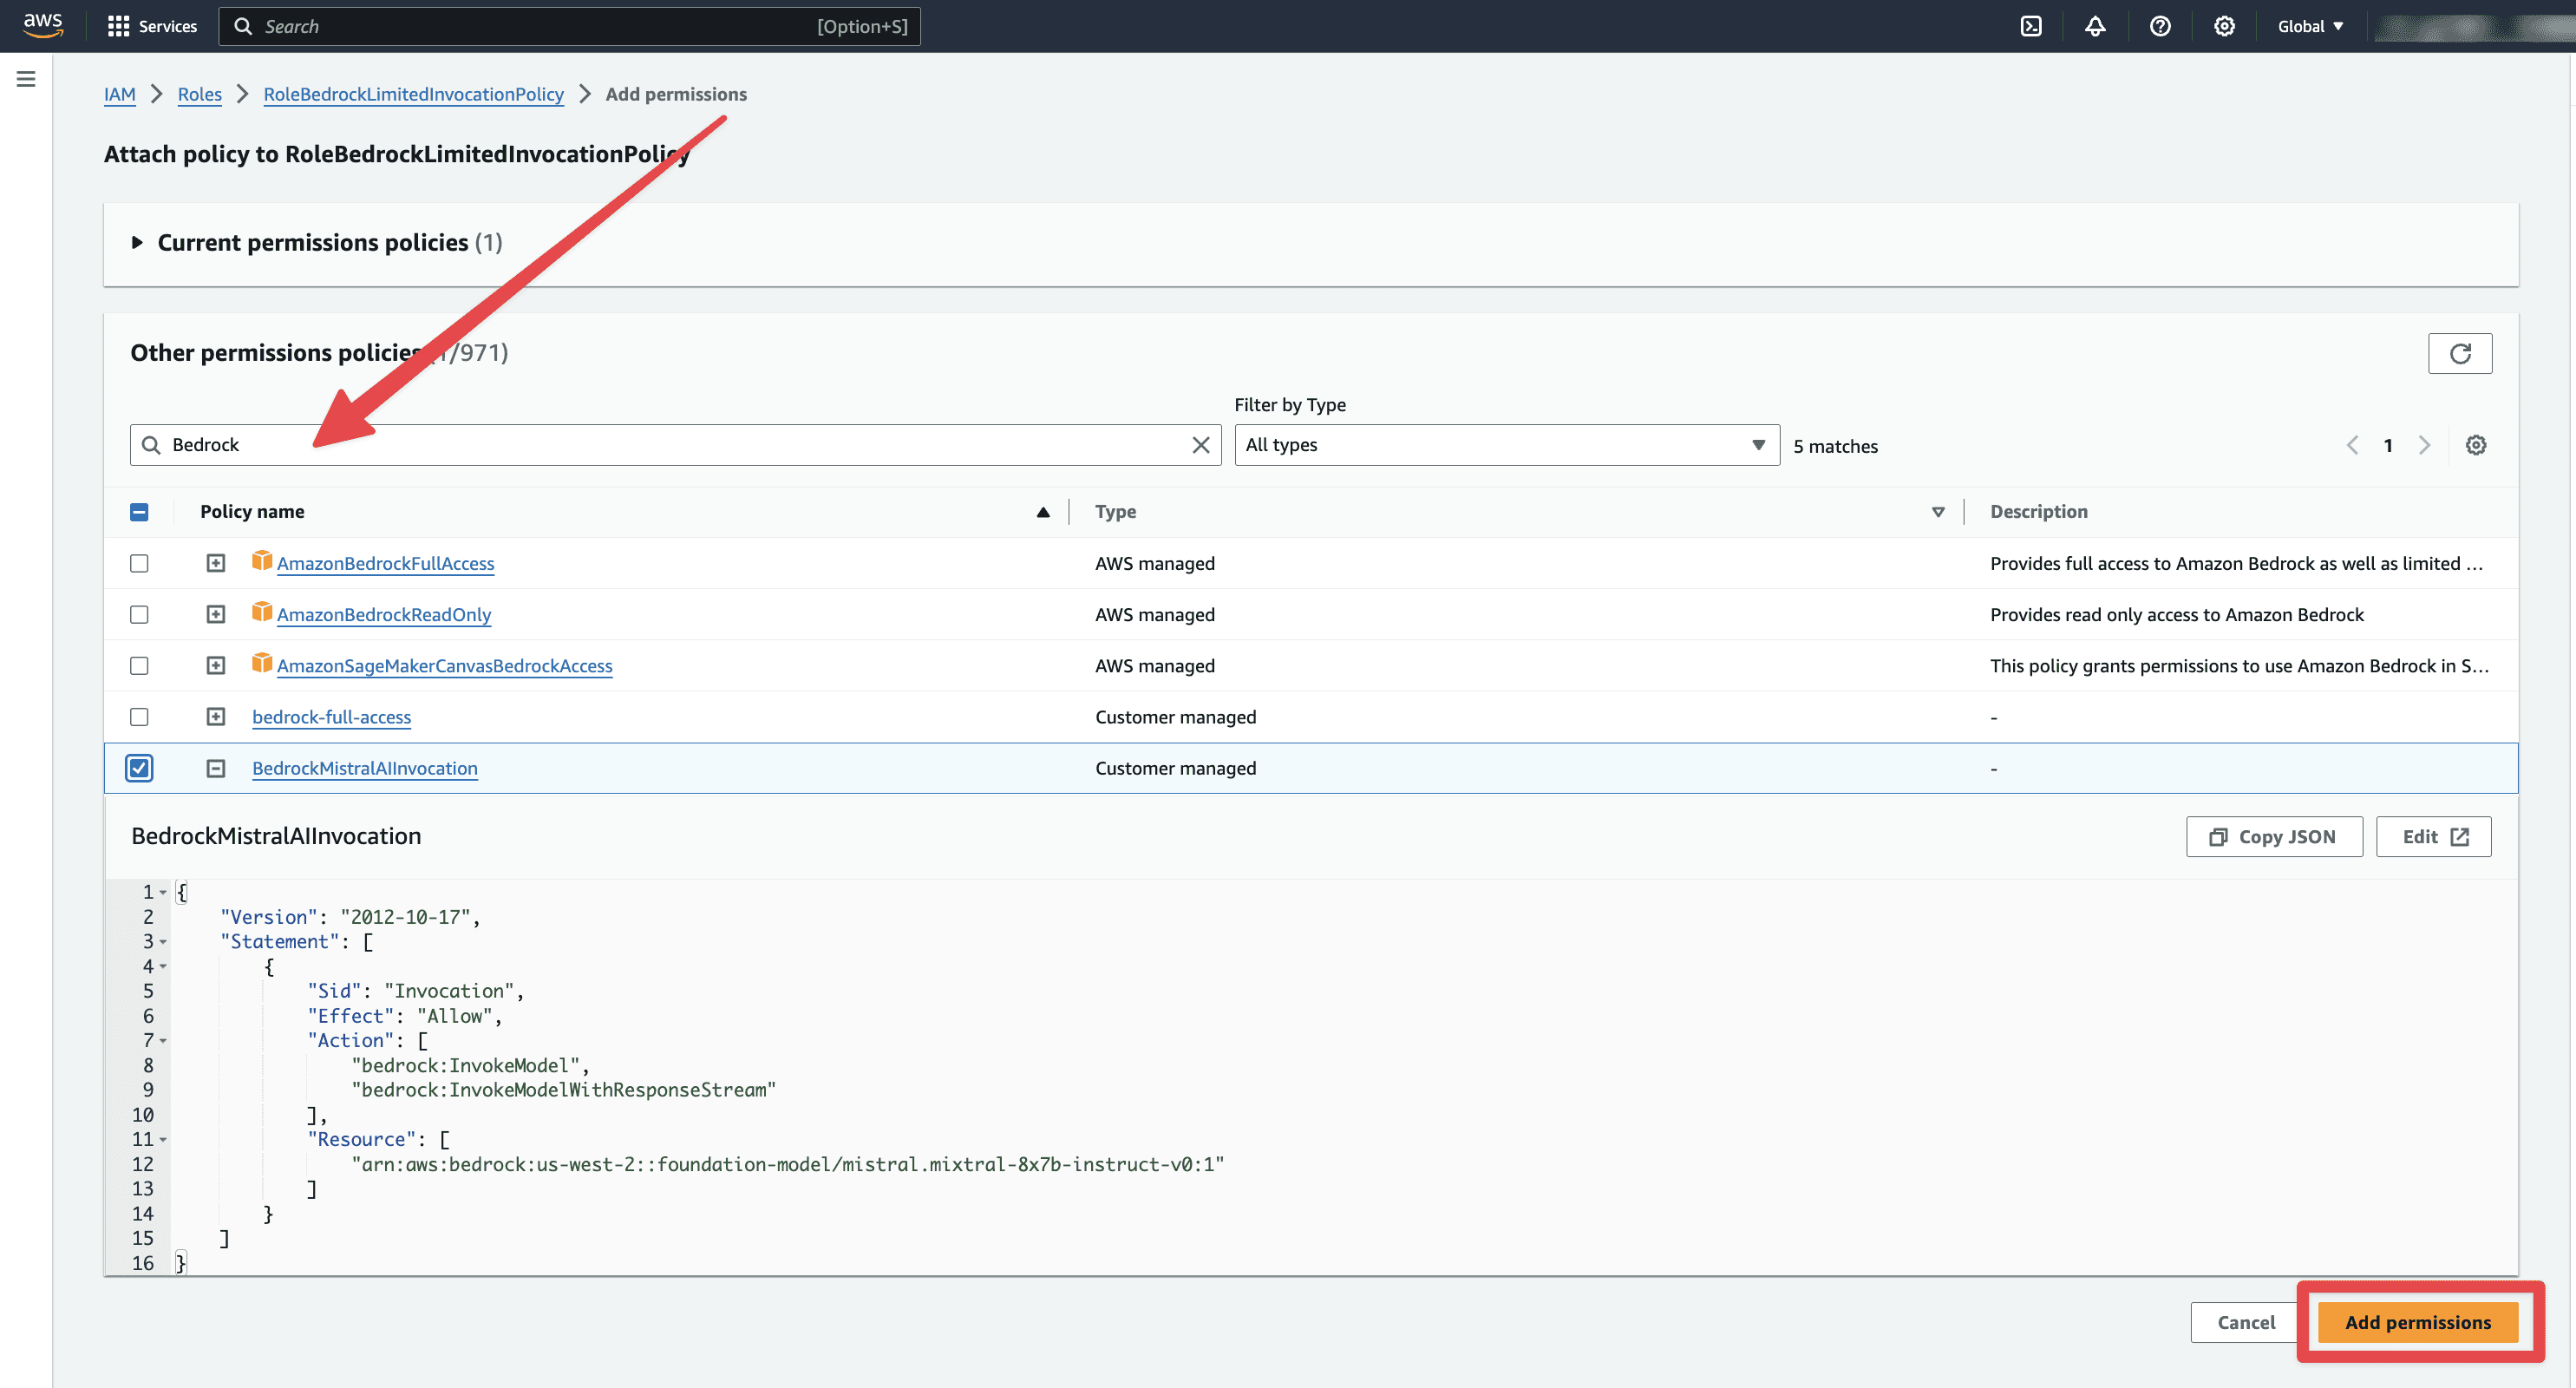
We also need to provide Bedrock access to this role. We need to create a Policy for limited Bedrock access and attach the same to above mentioned role.
Go to
Policiesfrom left-sidebar.Select
Create policyfrom top-right of the Policies page.On
Policypage, selectJSONtab onPolicy editorheader to add a policy in JSON format.Copy and paste the policy mentioned below in the
Policy editor. In case your region of AWS instance is different, edit it in the policy below underResourcesattribute where it saysus-west-2.
Click
Nextat the bottom-right of the pageAdd the
Policy name. Make sure to remember this as it will be used later. You can leave the rest of the settings as is.Hit
Create policybutton at the end of the page.You'll be redirected to
Policiespage. Now go toRolespage from the left-sidebar.Search for the
Roleyou want to attach or you have alread attached to EC2 instance.Click on the role to go to roles page. Look for add
Add Permissionin middle right of the page.In the dropdown, select
Attach Policies. You will be take toAttach Policy to Rolescreen.

Here, search for the policy you just created in above steps and attach it. Click
Add Permission
In
Network Settingsyou can create a newSecurityGroupor re-use an old one. Just make sure that:You can connect to the EC2 instance via SSH or using AWS Session Manager.
The server can make requests to any of the public facing domains that you want to see are reachable / have API endpoints behind them
You can access the instance's IP from your browser
Go to
Configure StorageThis depends on the number of repositories that you have, but we recommend you start with 100GB of disk space. We need enough disk space to check out your organization’s repositories.
Then press
Launch InstanceWait a few minutes. The instance will launch and you will see the below status for your EC2 Instance. Note that Public IPv4 address is optional.
Ensure IAM role which is you created above is attached on this screen. Look for
IAM Roleat bottom-left of the above screen. Also, we need to enableMetadata Servicesfor this EC2 instance so that we can create temporary token within EC2 instance to access Bedrock.If role is not already attached to this instance, click on
Actionsdropdown from top-right, Go toSecurityoption, and selectModify IAM role.You'll be taken to
Modify IAM rolepage for that instance. Search and select the newly created role and clickUpdate IAM role.
Click on the
Connectbutton from top-right of the instance summary page to connect to the instance. (refer screenshot above)Once you're connected to the EC2 instance terminal, switch to the directory where you would like to install p0. Then execute the below mentioned commands in the given order.
Note: The user must have sudo access as well as write access in the directory where p0 will be installed. This process may take 3-4 mins to complete.
Once completed, you'll see a message from the terminal like the screenshot below.

And now you can visit the IP address from your instance page.
Initially you will see the below as the p0 service comes up. Just wait for 5 minutes and re-visit the IP.
When you visit you should see the below. Follow the steps in the product for the rest of onboarding.