Scroll to:
Setup p0 on your on-prem server on Microsoft Azure
Welcome to the on-premise installation instructions for p0 on Azure. Follow this guide to get set up with your own version of p0.
Click on
Create new ResourceGo to
Virtual Machineand click onCreateSelect (or create) a Resource Group
Write a Virtual Machine Name:
p0-platformGo to Image
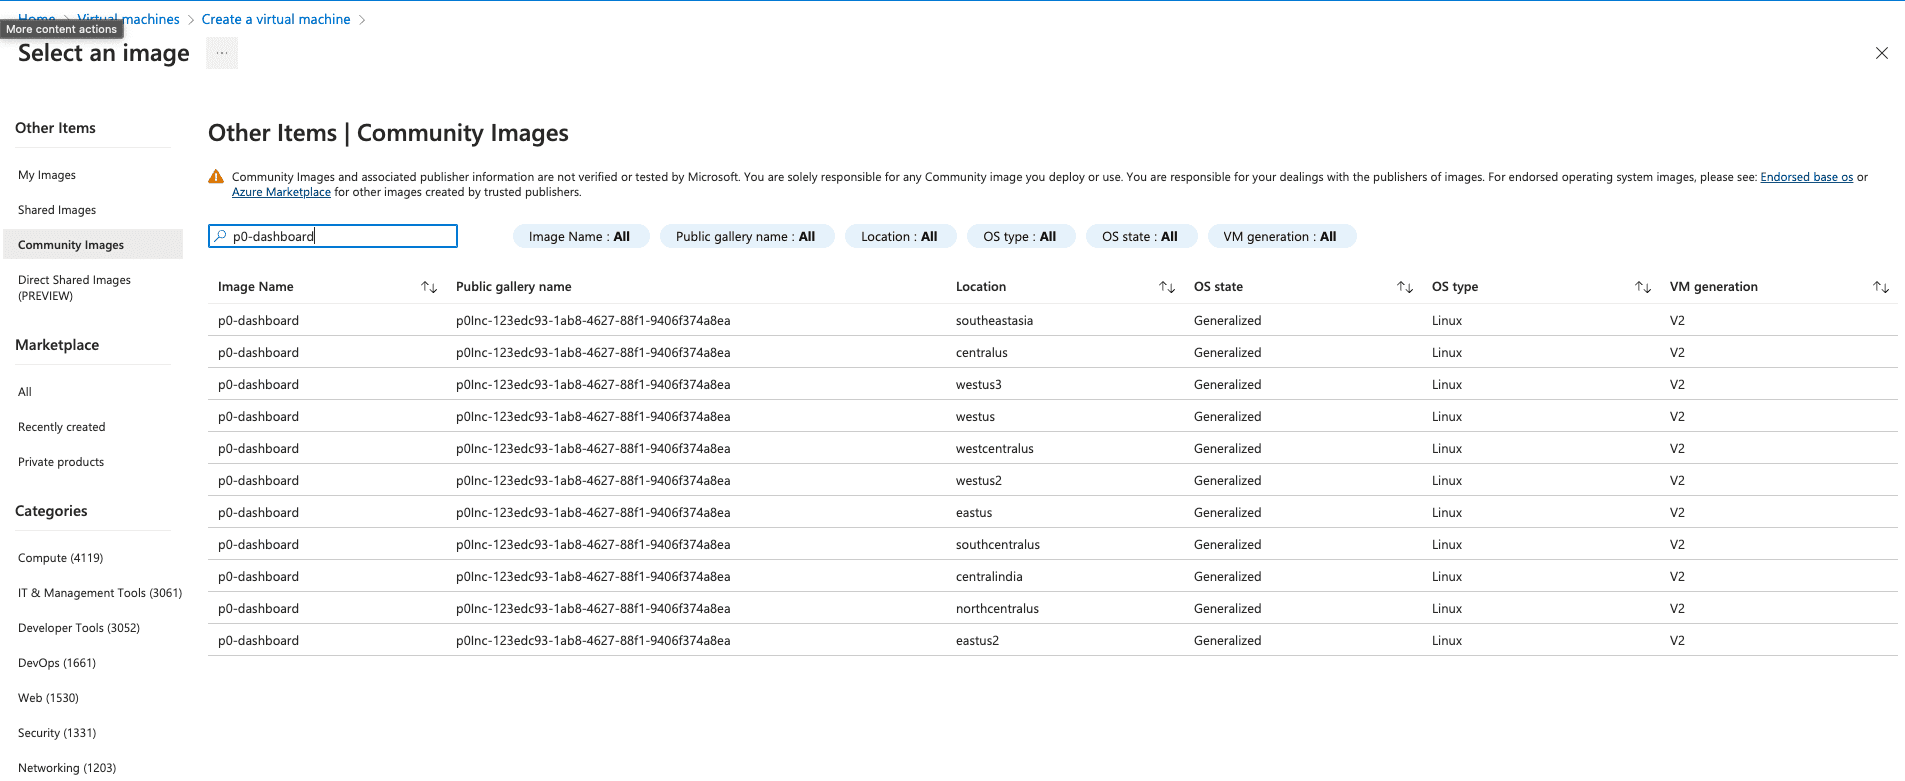
Select
See all imagesOn the left-hand side, click on
Community ImagesIn the search bar, enter
p0-dashboardand select the desired region.
Click on
Create new ResourceGo to
Virtual Machineand click onCreateSelect (or create) a Resource Group
Write a Virtual Machine Name
Select a Region
Go to Image
Select
See all imagesOn t
In
Search the marketplacesearch for<p0/p0Image/latest - x64 Gen2>Press
SelectFor
SizeselectStandard_B2s - 2 vcpus, 4 GiB memoryAlso create a new SSH key pair (Either create a new SSH Key pair, or use an existing one.
Also create a new SSH key pair (Either create a new SSH Key pair, or use an existing one. You will need this to ssh into the computer to set up p0)
Allow inbound ports
80,443and22Click
NextBump the
OS Disk size to 64 GiB(P0 needs about 30 GB of space, we recommend you have 40GB, and Azure only gives us an option for 64)Go to the
Networkingtab.Select a
Virtual networkor create oneSelect a
Public IPor create one
Press
Review + CreateMake sure you download your private key after clicking on Review + Create
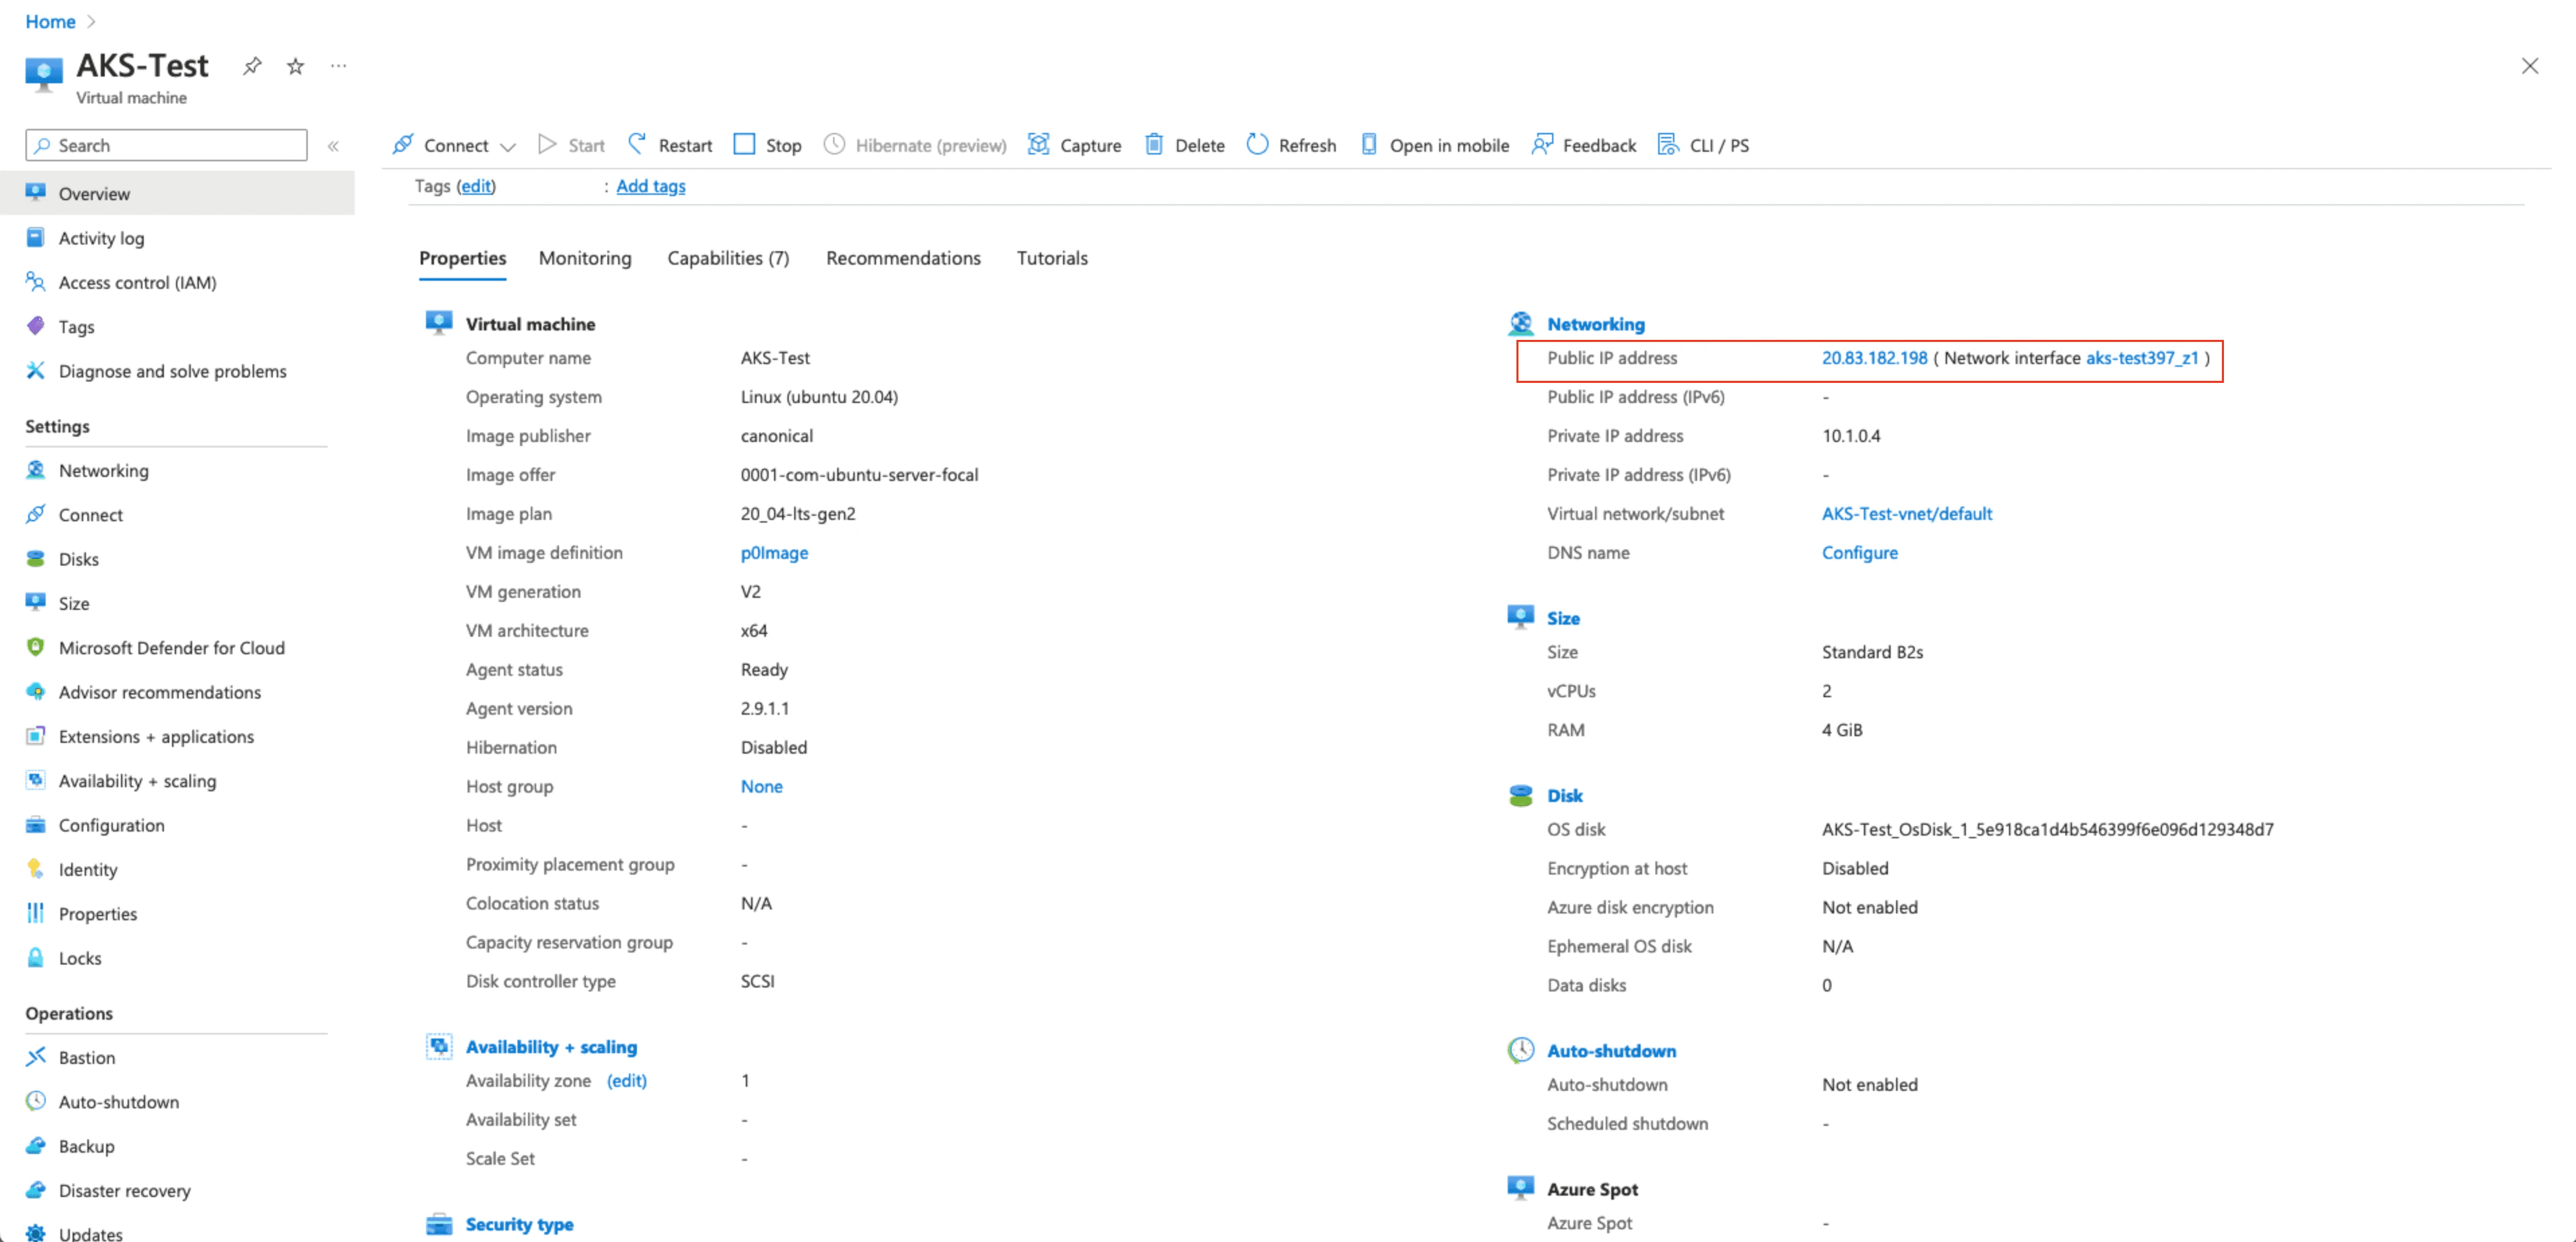
Once deployment is finished, go to
Deployment DetailsClick on the IP that you created. It looks like this
Note down the IP address (if you have trouble finding it Cmd/Ctrl + F for Public IP Address). You will need this for the final step.
Click on
Create new ResourceGo to
Virtual Machineand click onCreateSelect (or create) a Resource Group
Write a Virtual Machine Name
Select a Region
Go to Image
Select
See all imagesOn t
In
Search the marketplacesearch for<p0/p0Image/latest - x64 Gen2>Press
SelectFor
SizeselectStandard_B2s - 2 vcpus, 4 GiB memoryAlso create a new SSH key pair (Either create a new SSH Key pair, or use an existing one.
Also create a new SSH key pair (Either create a new SSH Key pair, or use an existing one. You will need this to ssh into the computer to set up p0)
Allow inbound ports
80,443and22Click
NextBump the
OS Disk size to 64 GiB(P0 needs about 30 GB of space, we recommend you have 40GB, and Azure only gives us an option for 64)Go to the
Networkingtab.Select a
Virtual networkor create oneSelect a
Public IPor create one
Press
Review + CreateMake sure you download your private key after clicking on Review + Create
Once deployment is finished, go to
Deployment DetailsClick on the IP that you created. It looks like this
Note down the IP address (if you have trouble finding it Cmd/Ctrl + F for Public IP Address). You will need this for the final step.
For
SizeselectStandard_B4s - 4 vcpus 16 GiB memoryAny instance with 4 vcpus and 16 GiB of memory.
Create a new SSH key pair (Either create a new SSH Key pair or use an existing one, you do not need this but it is good to have, as you can use this to restart the platform or shut it down if you need to)
Allow inbound ports
80,443, and22This is a recommendation - the only requirement here is that you be allowed to access the IP of the server so that you can see your scan results. If you have your own security configuration, use that.
Select License Type to
OtherClick
NextBump the
OS Disk size to 128 GiBThis is dependent on the number of repositories you have. We recommend at least a 100GB as we will be checking out all your organization’s repositories on premise.
As a guide, with one of our customers, 300 repositories took about 20GB of space, so you can decide how much space you want to allocate, as it will change the cost of hosting.
Go to the
NetworkingtabSelect a
Virtual networkor create oneSelect a
Public IPor create oneWe recommend that there are no egress rules as we will attempt to discover sub-domains. We will also hit APIs from this compute instance to test whether they are reachable from outside of the system.
Press
Review + CreateMake sure you download your private key after clicking on
Review + CreateWait for the deployment to initialize and complete.
Once deployment is finished, click on
Go to Resource(The page should look like the screenshot below)
Click on
Create new ResourceGo to
Virtual Machineand click onCreateSelect (or create) a Resource Group
Write a Virtual Machine Name
Select a Region
Go to Image
Select
See all imagesOn t
In
Search the marketplacesearch for<p0/p0Image/latest - x64 Gen2>Press
SelectFor
SizeselectStandard_B2s - 2 vcpus, 4 GiB memoryAlso create a new SSH key pair (Either create a new SSH Key pair, or use an existing one.
Also create a new SSH key pair (Either create a new SSH Key pair, or use an existing one. You will need this to ssh into the computer to set up p0)
Allow inbound ports
80,443and22Click
NextBump the
OS Disk size to 64 GiB(P0 needs about 30 GB of space, we recommend you have 40GB, and Azure only gives us an option for 64)Go to the
Networkingtab.Select a
Virtual networkor create oneSelect a
Public IPor create one
Press
Review + CreateMake sure you download your private key after clicking on Review + Create
Once deployment is finished, go to
Deployment DetailsClick on the IP that you created. It looks like this
Note down the IP address (if you have trouble finding it Cmd/Ctrl + F for Public IP Address). You will need this for the final step.
Click on the IP that you created.
Make sure that you visit http://<YOUR_IP>.
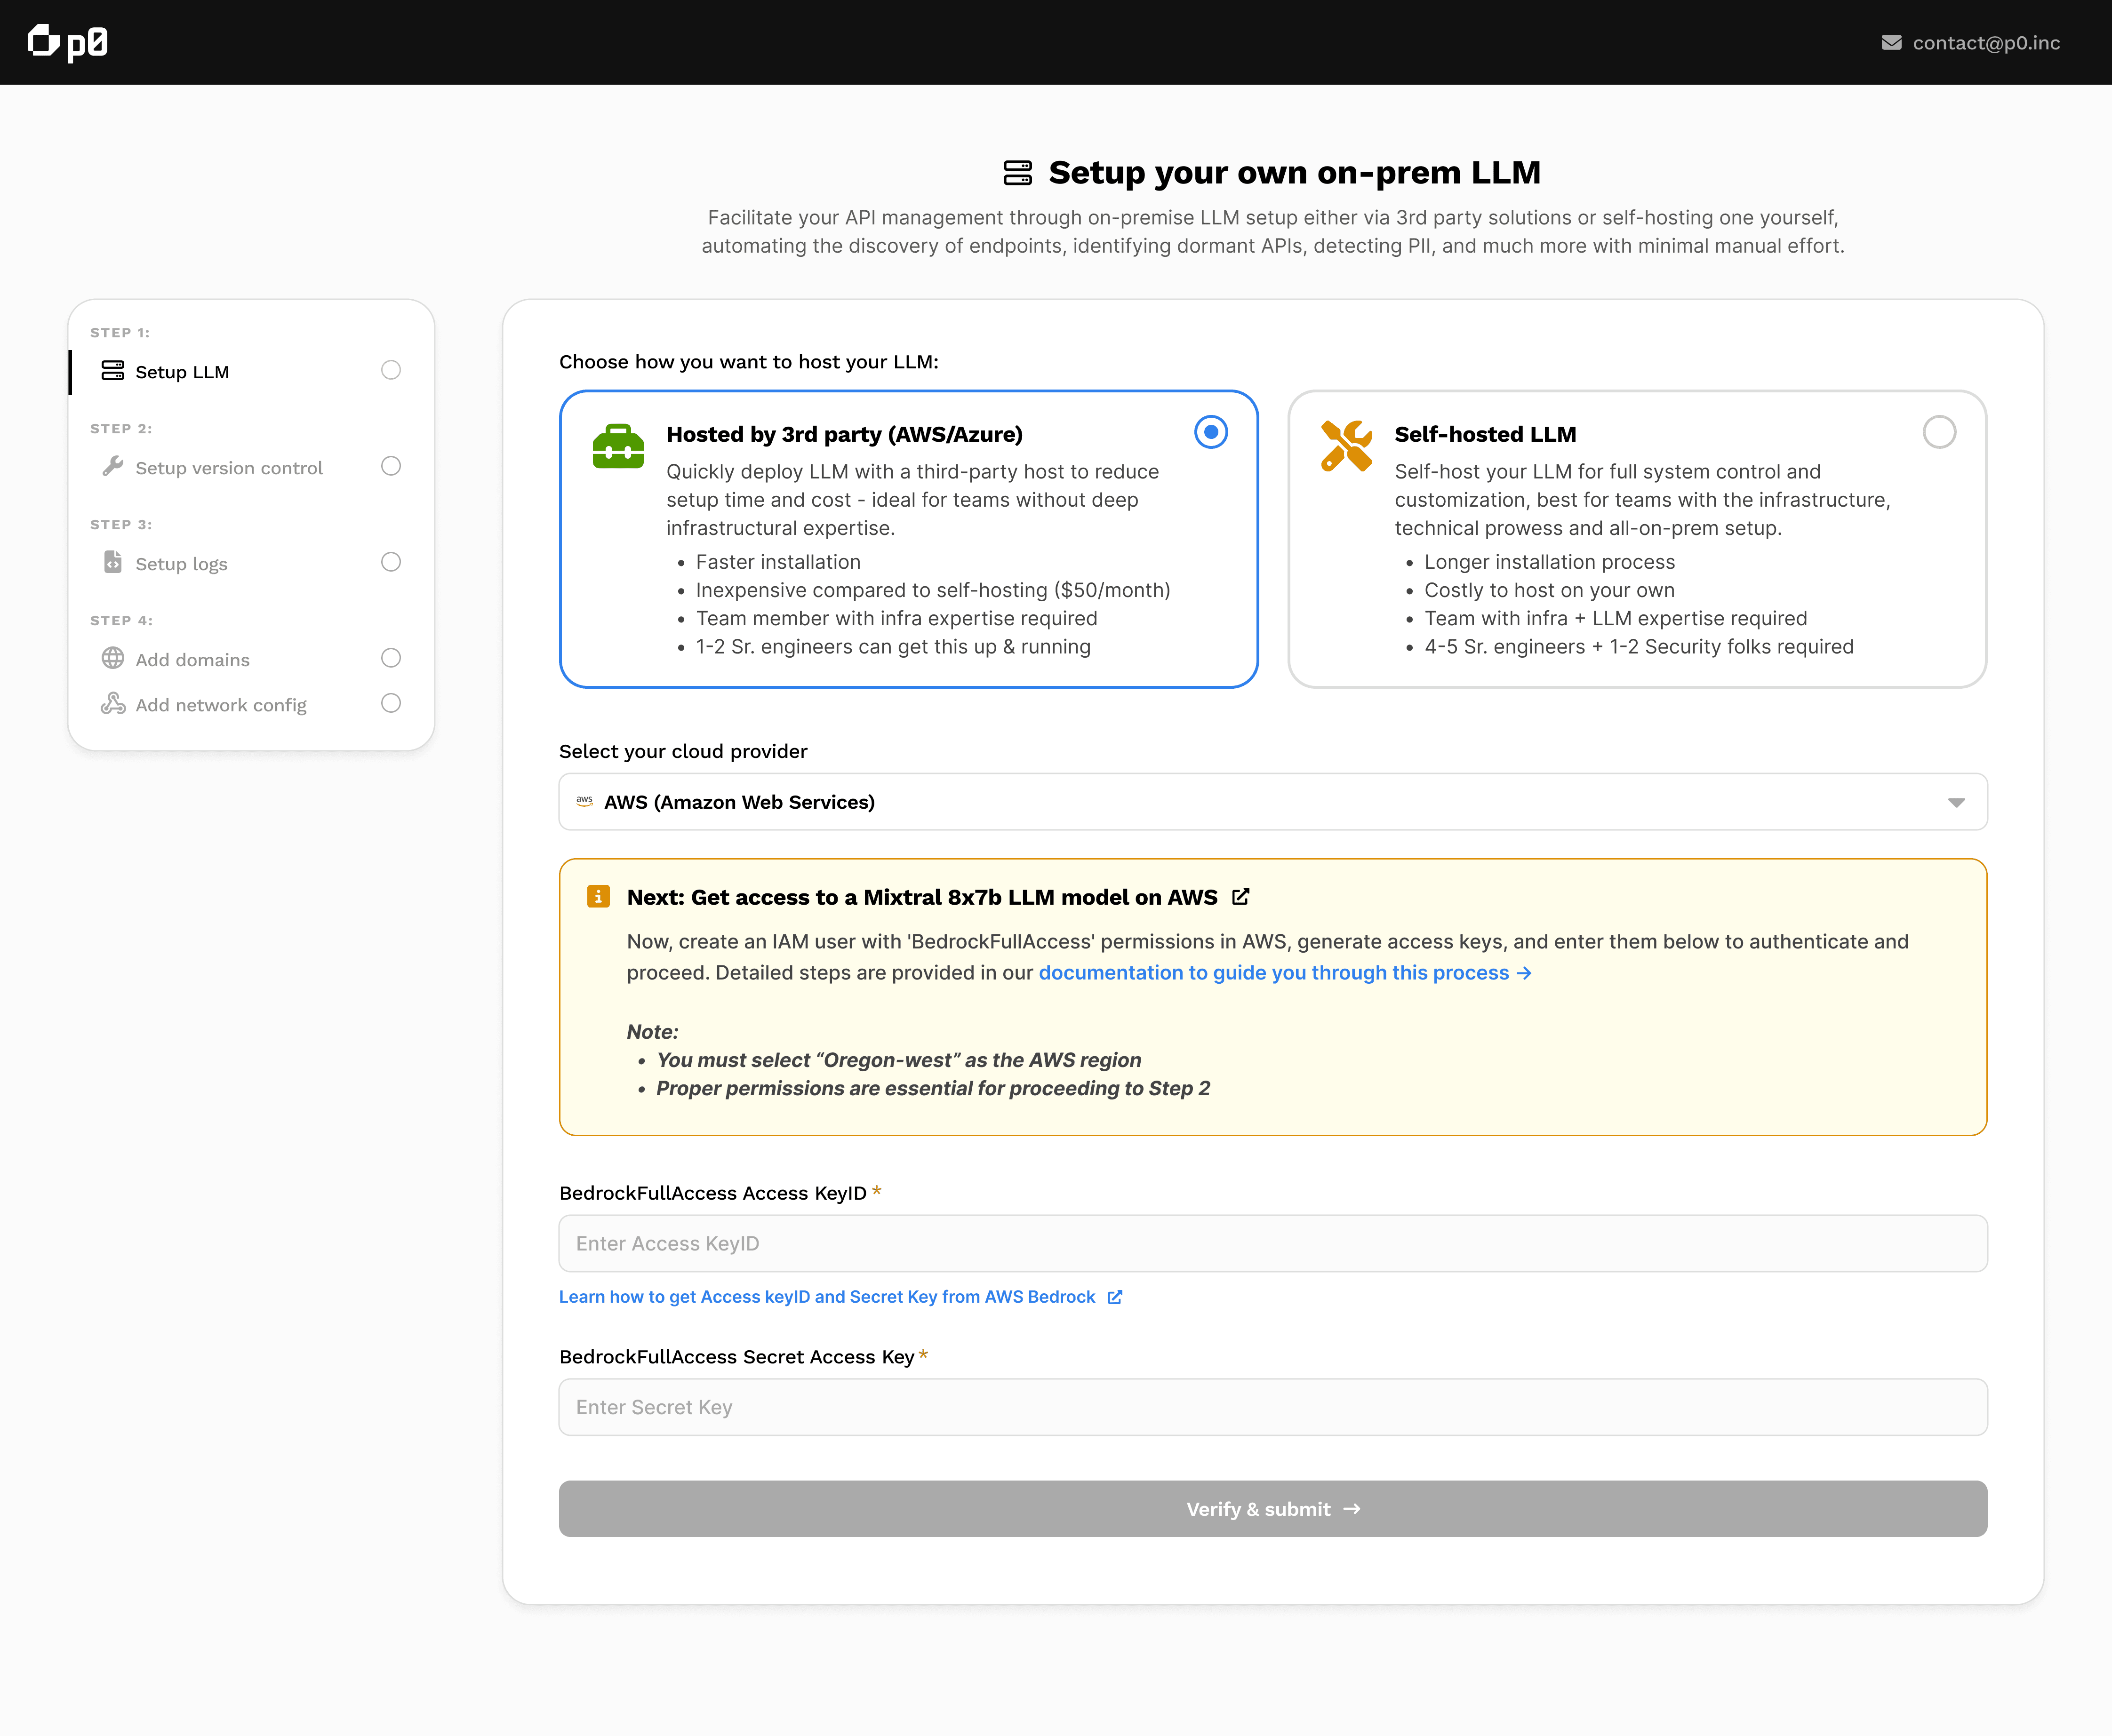
Visit this IP in your browser. The rest of the p0 Setup will continue in product.
Initially the website will be unreachable. Wait for a few minutes (2-3 mins) and you will see the below, which is the start of creating your scan.
Click on
Create new ResourceGo to
Virtual Machineand click onCreateSelect (or create) a Resource Group
Write a Virtual Machine Name
Select a Region
Go to Image
Select
See all imagesOn t
In
Search the marketplacesearch for<p0/p0Image/latest - x64 Gen2>Press
SelectFor
SizeselectStandard_B2s - 2 vcpus, 4 GiB memoryAlso create a new SSH key pair (Either create a new SSH Key pair, or use an existing one.
Also create a new SSH key pair (Either create a new SSH Key pair, or use an existing one. You will need this to ssh into the computer to set up p0)
Allow inbound ports
80,443and22Click
NextBump the
OS Disk size to 64 GiB(P0 needs about 30 GB of space, we recommend you have 40GB, and Azure only gives us an option for 64)Go to the
Networkingtab.Select a
Virtual networkor create oneSelect a
Public IPor create one
Press
Review + CreateMake sure you download your private key after clicking on Review + Create
Once deployment is finished, go to
Deployment DetailsClick on the IP that you created. It looks like this
Note down the IP address (if you have trouble finding it Cmd/Ctrl + F for Public IP Address). You will need this for the final step.
Contact us
If you are facing any trouble setting up your on-prem application, reach out to us at contact[at]p0[dot]inc
Contact us
If you are facing any trouble setting up your on-prem application, reach out to us at contact[at]p0[dot]inc
Contact us
If you are facing any trouble setting up your on-prem application, reach out to us at contact[at]p0[dot]inc