Setup LLM model for Amazon AWS
We take data security very seriously. Your code will sit on your premises and go to a model that you control, sitting in your cloud.
Step 1: Get Access to Mixtral 8x7B on AWS Bedrock
AWS Bedrock is a fully managed service providing foundational Model Access. It is in scope for SOC2, HIPAA and ISO and is in compliance with GDPR. For more details on data security, click here.
Visit here. Click
Model Access. SelectMixtral 8x7B Instructand hit “Save Changes”You should see the below after a few seconds.

Note: Mixtral 8x7B is a completely open source model that is publicly available. This means none of your data is used to train Mixtral 8x7B.
Step 2: Give us access to Mixtral 8x7B on AWS Bedrock
Option #1: via IAM user
You will have to create an IAM user so that p0 can access AWS Bedrock on your behalf.
Click here. Create an user name (
bedrock). Click Next.Click
Attach Policies Directly. Search for Bedrock. SelectAmazonBedrockFullAccessClick
NextClick
Create UserChange your IAM user in the link here and paste in your browser:
Create
Access Key—>Local Code—>Next—>Create access key. Keep yourAccess KeyandSecret Accesshandy for the product.

Option #1: via IAM user
Option #2: via IAM role
Create a new IAM Policy for Bedrock access
Sign in to the AWS Management Console and open the IAM console at https://console.aws.amazon.com/iam/
In the navigation pane on the left, choose
Policies.Choose
Create policy.In the Policy editor section, choose the
JSONoption.Copy and paste the policy mentioned below in the
Policy editor. In case your region of AWS instance is different, edit it in the policy below underResourcesattribute where it saysus-west-2.
Click
Nextat the bottom-right of the pageAdd the
Policy name. Make sure to remember this as it will be used later. You can leave the rest of the settings as is.Hit
Create policybutton at the end of the page.
Assign the above policy to an IAM role
Click here to create a new IAM role.
OR, to use an existing IAM role, make sure it has
Amazon EC2Use case enabled and follow the below steps:Open the details page of the
IAM roleyou want to use with your EC2 instance.On the roles detail page, look for add
Add Permissionsin middle-right of the page.In the dropdown, select
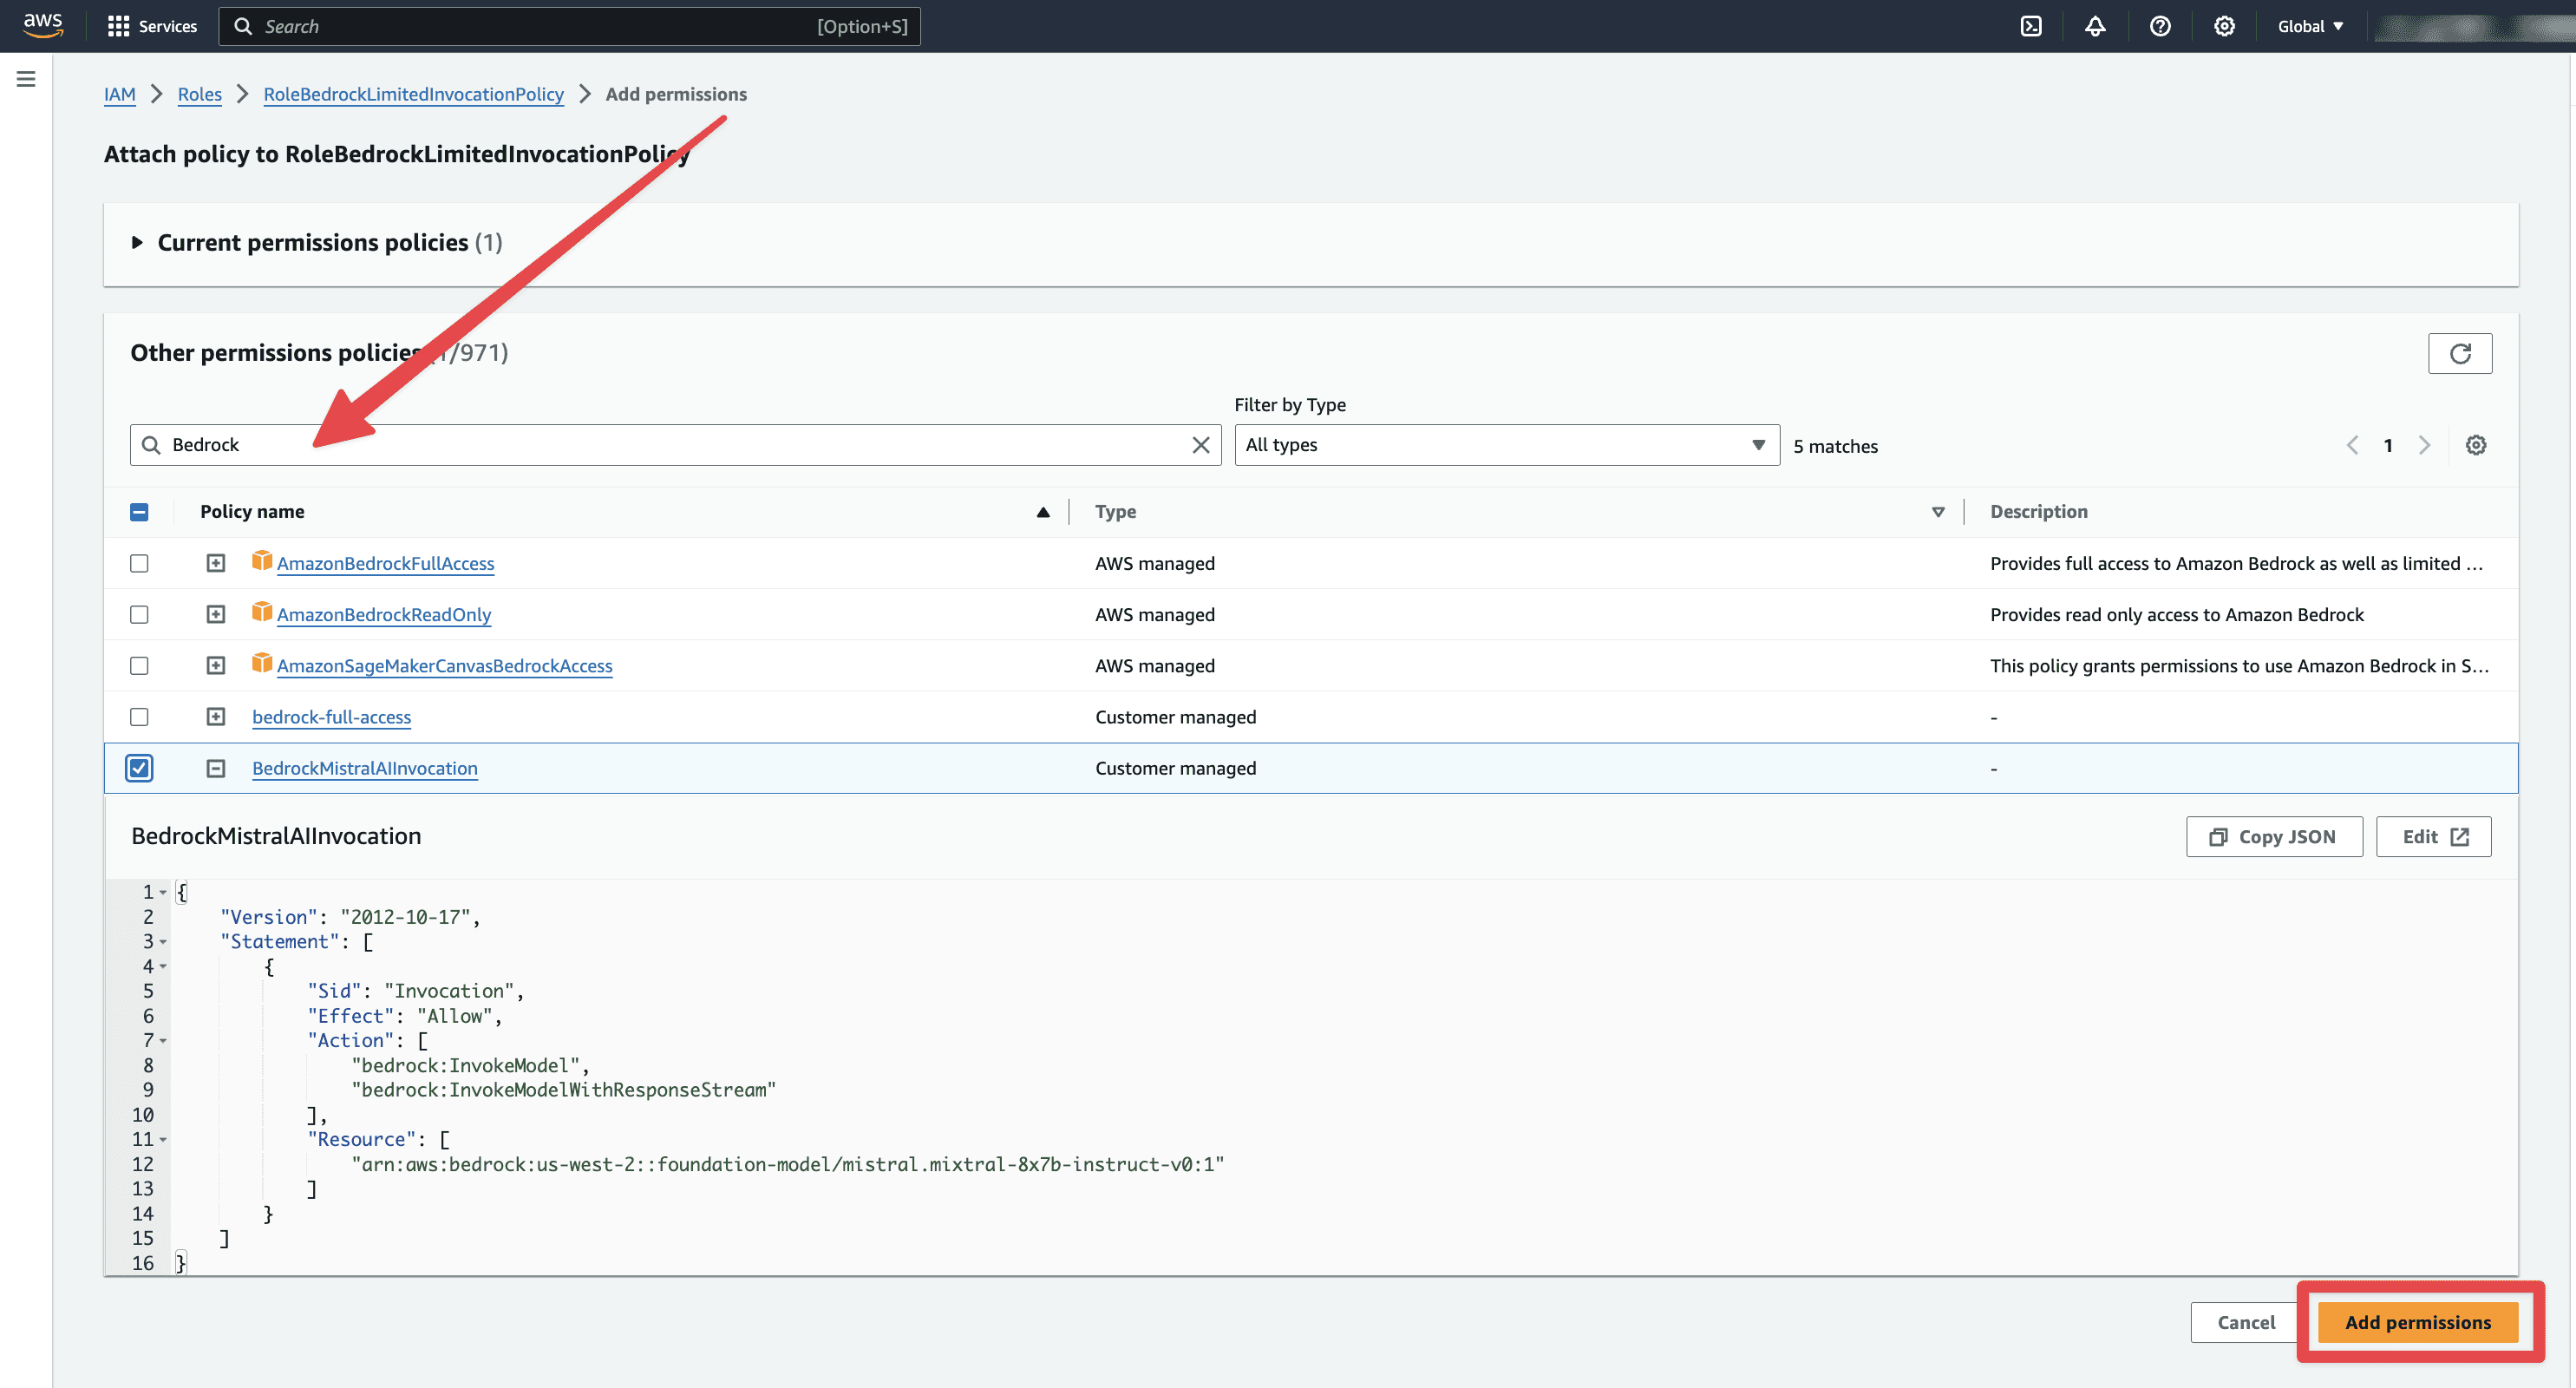
Attach Policies. You will be taken to theAttach Policy to Rolescreen.

Here, search for the policy you just created in the above step and select it. Then, click
Add Permissionbutton at the bottom-right of the screen.
Create an EC2 IAM role with Bedrock policy
Sign in to the AWS Management Console and open the IAM console at https://console.aws.amazon.com/iam
In the navigation pane, select
Roles, then selectCreate role.For Select trusted entity, under Trusted entity type, choose
AWS service.Under Use case, choose
Amazon EC2, then selectNext.For Add permissions, select the checkbox for the policy you have created for Bedrock from the policy list, then select
Next.Enter a name for the role, then select
Create role. Remember this name because you'll need it when you create your Amazon EC2 instance.